Contact Us


How to Install a Bathroom Shower Drain
Installing a bathroom shower drain is a crucial part of constructing a comfortable bathroom shower. The shower drain carries waste water away from the shower pan, helping to prevent unwanted odors in the home. From initiation to completion, the process of installing a new drain demands nothing more than a bit of effort and roughly an hour of your time! In this guide, we will take you through the step-by-step process of installing a bathroom shower drain. Whether you're a seasoned DIY enthusiast or a first-timer, this guide will equip you with the knowledge and confidence to undertake this project.
Materials and Tools
Materials:
Shower drain kit
PVC or ABS drainpipe (as per your local plumbing codes)
Waterproof membrane or shower pan liner
Mortar mix
Gravel or pebbles (for drainage)
Silicone caulk
Tools:
Screwdriver
Hacksaw or reciprocating saw
Adjustable wrench
Trowel
Level
Rubber gloves
Carpenter's pencil
Measuring tape
Before embarking on the installation journey, gather the essential materials and tools. Having everything at your disposal ensures a smooth and efficient installation process. The followings are what you'll need:
Step 1: Planning and Preparation
Before diving into the installation process, it's essential to plan and prepare the area. Consider the placement of your shower drain in relation to the shower walls and any other fixtures. Ensure that your shower design complies with local building codes and regulations.
Step 2: Selecting the Right Shower Drain Kit
Shower drain kits come in various designs and configurations. Choose a kit that complements your bathroom aesthetics and meets your plumbing needs. Pay attention to the type of drain (center, offset, linear) and whether it fits into a traditional two-inch drainpipe or a modern three-inch drainpipe.
Step 3: Marking the Drain Location
Once you've selected the right shower drain kit, mark the center of the drain location on the shower floor. Use a carpenter's pencil to make precise markings, ensuring accuracy in the placement.
Step 4: Removing the Subfloor
With the drain location marked, it's time to prepare the subfloor. If your shower is on a raised platform, use a reciprocating saw or a handsaw to cut through the subfloor along the marked lines. Remove the cut section to expose the joists beneath.
Step 5: Installing the Shower Pan Liner
A waterproof membrane or shower pan liner is crucial for preventing water from seeping into the subfloor and causing damage. Lay the liner over the exposed subfloor, ensuring that it extends up the walls by at least six inches. Secure the liner in place using staples or adhesive.
Step 6: Constructing the Mortar Bed
To create a stable base for your shower, mix mortar according to the manufacturer's instructions. Spread the mortar over the shower pan liner, sloping it gently towards the drain to ensure proper drainage. Use a level to confirm that the mortar bed is even.
Step 7: Installing the Drain Flange
Place the drain flange into the opening you've cut in the subfloor, ensuring that it aligns with the center mark. Screw it into place using the provided screws. This step is critical, as the proper installation of the drain flange ensures a secure foundation for the shower drain.
Step 8: Connecting the Drainpipe
Attach the drainpipe to the bottom of the drain flange, making sure it extends beyond the shower base. Use an adjustable wrench to secure the connection, ensuring it is watertight.
Step 9: Checking for Leaks
Before proceeding further, it's wise to conduct a preliminary leak check. Pour water into the shower base and observe the connections for any signs of leakage. Address any issues promptly to prevent water damage in the future.
Step 10: Applying Silicone Caulk
To reinforce the waterproof seal around the drain, apply a generous bead of silicone caulk where the drain flange meets the shower base. This additional layer of protection helps prevent water from seeping through any gaps.
Step 11: Finishing the Drain Installation
Once the silicone caulk has cured, it's time to complete the drain installation. Attach the strainer or cover plate that came with your shower drain kit, securing it in place with the provided screws. This not only adds a finishing touch to your installation but also prevents debris from entering the drain.
Step 12: Testing the Drain
With the drain fully installed, it's time for the ultimate test. Run water through the shower to ensure proper drainage. Observe the flow and check for any issues such as slow drainage or unusual sounds. If any concerns arise, troubleshoot accordingly.
Step 13: Finalizing the Shower Floor
Once you're satisfied with the drain's performance, you can proceed to complete the shower floor. Depending on your design, this may involve laying tiles, installing a pre-fabricated shower pan, or other finishing touches to transform your shower into a haven of relaxation.
How to Install a Linear Shower Drain
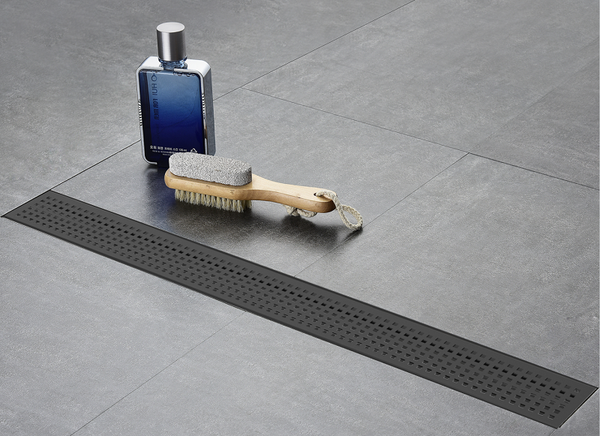
Installing a linear shower drain can be a bit more complex than a traditional round drain, but it offers a modern and stylish look for your shower. Here are the guiding steps to installing a linear shower drain:
Materials and Tools You'll Need:
Linear shower drain kit
Drainage pipe (PVC or ABS)
Waterproofing membrane or shower pan liner
Mortar or adhesive
Tile and tile installation materials
Grout
Level
Measuring tape
Screwdriver or wrench
Saw
Trowel
Rubber gloves and safety goggles
Step 1: Plan and Prepare:
Determine the location of the linear drain in your shower. It's usually installed at the lowest point to ensure proper drainage.
Measure and mark the drain location. Make sure that your plumbing is correctly routed to the drain location.
Step 2: Cut the Subfloor:
Cut a hole in the subfloor for the linear drain to fit through. Make sure it's wide enough to accommodate the drain body.
Step 3: Install the Drain Body:
Slide the drain body through the hole in the subfloor.
Attach the drain body to the drainage pipe using the appropriate connectors.
Use a level to make sure the drain body is perfectly level.
Step 4: Install the Waterproofing Membrane:
Apply a waterproofing membrane or a shower pan liner to the shower floor and walls to create a waterproof barrier. Overlap the membrane seams and ensure that it directs water towards the drain.
Step 5: Build the Sloped Mortar Bed:
Create a sloped mortar bed on top of the waterproofing membrane to ensure proper drainage. The slope should be about 1/4 inch per foot towards the linear drain.
Step 6: Set the Drain Grate:
Place the linear drain grate or cover onto the drain body.
Ensure that the grate is level with the shower floor surface.
Step 7: Tile Installation:
Install the tile over the mortar bed, making sure that the tiles slope towards the linear drain for proper drainage.
Leave a small gap between the tile and the linear drain grate for grout.
Step 8: Grouting and Sealing:
After the tile adhesive has dried, grout the tile joints.
Seal the grout lines to prevent water infiltration.
Step 9: Final Check:
Check the drain for proper flow by pouring water over the floor.
Inspect for any leaks and make sure water flows smoothly into the drain.
Step 10: Final Finishing
Clean and finish the surface as per your design preferences.
Proper installation of a linear shower drain is essential to ensure effective drainage and prevent water damage. If you are not experienced with plumbing and tile work, it's advisable to seek the help of a professional plumber or contractor to ensure a secure and leak-free installation.
Cleaning and Maintenance of Your Shower Drain
Blockages in shower drains occur when hair and product buildup accumulate, leading to foul odors and poor drainage. So regular cleaning of shower floor drains is especially important. Proper care involves regular removal of hair strands from the strainer, including a monthly deep clean with boiling water to dislodge soap residue and restore normal flow. Keeping a clean shower drain contributes to a comfortable and enjoyable bathing experience, extending its service life.
In conclusion, the installation of a bathroom shower drain is a fundamental step in creating a functional and aesthetically pleasing shower space. Whether you opt for a traditional round drain or a modern linear one, the process outlined in this comprehensive guide can be undertaken with confidence by both seasoned DIY enthusiasts and those attempting it for the first time.
By carefully selecting the right materials and tools, planning the installation, and following each step diligently, you can achieve a professionally installed shower drain that ensures efficient water drainage and prevents potential issues like leaks and odors.
In your journey to a comfortable and well-maintained bathroom, the installation and care of your shower drain play pivotal roles. Whether it's a soothing shower after a long day or a refreshing start to your morning, a well-functioning drain ensures a seamless and enjoyable experience.
Join Our STARBATH VIP Group

You can get:
- Get product for free;
- Try our new products first for free;
- Get latest STARBATH news, such as discount code, new product release, tips etc;
- Good after-sale service;
- Join our group link: https://www.facebook.com/groups/starbathvipgroup
Leave a comment